messyplayforeveryday

A collection of fun activities for little hands!

Ice Treasures

001

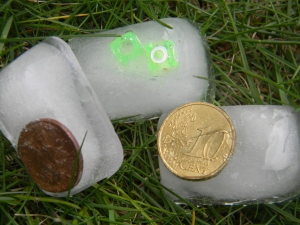
We are in a bit of a heat wave here, so I knew we needed something fun and cool for an activity this weekend.  Enter Ice Treasures, a simple concept that will keep the kids interested and cool them off all at the same time!  Here’s what you need

Ice cube trays

Water

Water friendly toys/items (beads, coins, small figures etc)

Play hammers

Fill your ice-cube trays with water and drop into each cube, one (if large) or a few (if small) of the water friendly items.  Freeze over night.  The next day, sit outdoors and give each of your little ones a kid friendly hammer to begin chipping the ice away to get to the treasure inside!  We did this right in the grass and they had so much fun!  For a little extra enjoyment you can create a large block of ice by filling a larger plastic container with the water and toys.  This lasts a bit longer and takes a little more effort on the kid’s part, so gage the activity by the child’s age. Enjoy and stay cool!!
Leave a comment »

Conditioner-Dough

photo (17)

We are headed out to brunch this morning and I’m just not sure how my son is going to be.  Restaurants are not really his thing and with a lot of family there I’m sure he’s going to be distracted and not want to sit and be patient.  Patience for a 3 year old boy is just not heard of!  I decided I needed to pull some tricks out of my hat to keep him entertained so threw some new things in the “busy bag” we bring out to eat with us.  My co-workers are credited for this one (thank you Kim and Ellen!!) since they were doing this in their group the other day and I knew it was something my two would really enjoy.  Here’s what you need

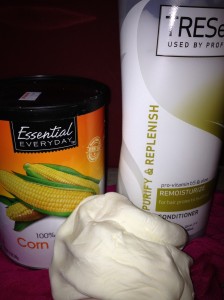
1/2 cup of cheap conditioner

1 cup Corn starch

Plain and simple dump the ingredients together and mix them up (really that is it, nothing complicated here!!).   I will say that I added lit bits of extra corn starch to the mixture at a time until it was no longer sticky to the touch. Place it in a ziplock bag for storage (or in my case transport) and your good.  I didn’t even give them tools to use like I usually do with play dough, just their bare little hands and boy did those little hands smell good after!!  Hope yours enjoy it as much as my loves did!

1 Comment »

Goop!

003

I’m tired today.  I had a horrible night’s sleep and by mid-afternoon needed the kids to be involved in something where they weren’t fighting and I could sit back in a chair and veg-out for a while!  What better than goop to keep them busy for a half hour or so!  Easy and fun (though messy with little ones who don’t understand yet to keep it on the tray, thankfully mine are old enough!).  Here’s your material list

Shaving Cream

Cornstarch

Bucket or tray

Warm soapy water

Towel

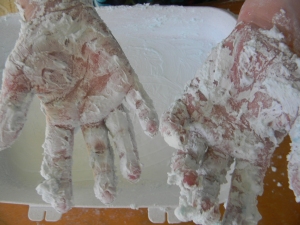
All you need to do to create this moldable, sticky goop is mix in the bucket or tray equal parts of the cornstarch and shaving cream (you can play with the amounts to create different textures as well).   Period, nothing else, besides letting your children explore the cool texture.  When they’re done they can dip their hands in the warm soapy water to scrub up and towel dry.  Same for your bucket and surface, some warm soapy water and it all disappears.  Hope your little ones have a blast with this!!

Leave a comment »

Let It Snow!

018

My kids have been not so patiently waiting for it to snow, so this week when it did of course the forecast was for it to turn to rain before I got home from work. Knowing they would not be so happy if they got home and the snow was no more I grabbed a large tub and scooped up as much snow as it would hold, covered the top to protect it from the rain and left it on the back porch. When we were done with our respective school and work days the fun began, even though outside it was a mushy, rainy mess. Here’s what you need

A large storage container

Fresh snow

A large towel

Waterproof Mittens

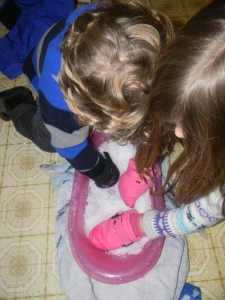
A laid the towel on the floor of my kitchen and placed the tub on top of it. My only instructions were, you need to keep mittens on while you’re playing in the snow and there is no throwing it. They were in heaven!! We might not have been able to go outside in the now pouring rain, but they got their fill of scooping, rolling, stacking and packing snow right in our own kitchen. Have fun and let it snow!!

Leave a comment »

Pumpkin Guts!

This is quite possibly my favorite (and easiest) messy play activity of fall.  After you scoop the membranes and seeds out of your pumpkin, resist the urge to throw them out!  Instead place them in a big bowl, bucket of storage container and let your kids squeeze it through their fingers, ooze it through their toes, or mix it with a spoon if they’re not quite so brave.  It’s a wonderful sensory experience and you’ll be amazed at how long they’ll stick with it!

Leave a comment »

Tub Paint

My two love tubs, but who doesn’t want to have even more fun with something that’s already pretty cool?  This is an easy way to let your little people have even more fun in the tub, (and it doesn’t hurt that it cleans your tub too!!).  All you need is

Shaving cream

Food coloring

A muffin tin or washed applesauce single serve containers

A spoon

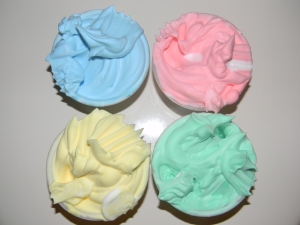
Fill the applesauce containers with shaving cream and add food coloring to make the color you like.  (For these colors I used three drops of each color).  Use the spoon to mix the coloring and shaving cream together and that’s it!  You can give your kids paint brushes to use in the tub with these, or they can use their fingers.  They can paint the tub, shower walls, themselves whatever (they do need to avoid their eyes) and it all washes off at the end of the tub.  Hope you all enjoy!

Leave a comment »

Salt Tray

Not sure how it happened so quickly but somehow my daughter has turned 5 and is preparing for kindergarten.  Thinking about this brings me back to my teaching days and the techniques I would use to help the kids learn to read and write.  This was one of the kids (and my!) favorites and has quickly become my daughter’s favorite way to practice her letters, numbers and writing.  All you need are

Cookie sheet

Salt

That’s it, nothing fancy and you probably have it on hand!  Simply pour a thin layer of salt into the cookie sheet and let your child draw with their finger.  They can make just about anything from a picture to a number, a letter, their name or a word.  It’s great practice and feels great while they’re doing it.  If your little one is just learning these things you can use a red marker on a standard sheet of paper and write the letter, number, word etc that they are working on and place it on the cookie sheet before placing the salt on top.  This allows them to have a guide as they practice.  Very easy and a great way to practice those all important kindergarten skills.  Have fun!


Leave a comment »

Sensory Bags

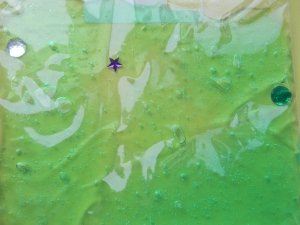
Is your little one (or maybe you!) not quite ready to jump into this messy play stuff?  A great way to introduce it without the mess is by creating these sensory bags.  Here’s what you need

Double Zipper Freezer Bag

Colored Hair Gel

Squeeze the hair gel into the freezer bag.  Make sure you have as much air out as possible and then seal the bag.  Now your kids can “write” in the gel with their fingers creating shapes, letters designs etc without getting their hands dirty.  Feeling creative?  Drop some large glitter or gems into the bag with the gel to add to the fun!  Fun and (can you believe it) NOT messy!!

Leave a comment »

Bucket O’ Beans

A fun way to explore messy play is with dry beans.  All you need is

bag of dry beans

plastic container

sand toys and other items for scooping and dumping

Pour a bag of dry beans ( usually I grab kidney beans since they’re colorful and a neat shape!) into a plastic container.  Give your little ones small shovels, rakes, cups, spoons etc to dump, fill, pour and explore.  That’s it, enjoy!

Leave a comment »

Edible Slime

Time to get messy!!  Edible slime is a yummy, sticky, sweet substance your kids will love to play with.  It only takes a few ingredients and a few minutes to create, but will give your kids an hour of entertainment.  All you need are:

14 oz can of sweetened condensed milk

2 Tbl cornstarch

Few drops of food coloring of your choice

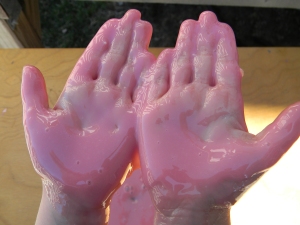
In a sauce pan place your sweetened condensed milk and turn it to low.  Once it has been heated through sprinkle the cornstarch on top and carefully mix it in until the mixture has thickened a bit.  Add your food coloring (we made pink) and stir it together.  Pour it into a cookie sheet or pie plate and allow it to cool completely before playing.  For clean up have a warm, soapy bucket of water nearby to dip dirty hands into and the mixture comes right off.  Very cool, enjoy!

Leave a comment »